How to Paint Patio Furniture Like a Pro: The Complete 2026 Guide
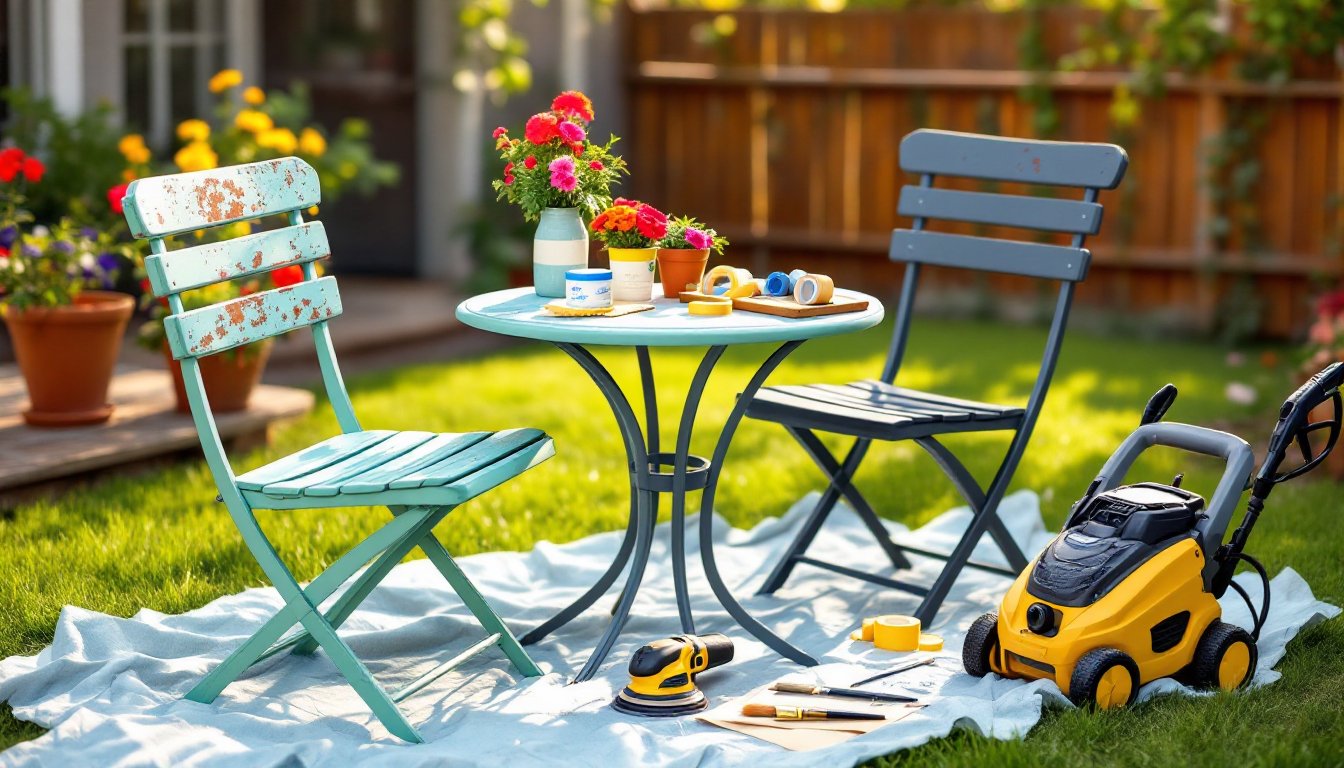
That old bistro set has seen better days, faded paint, surface rust, maybe a chip or two. Before you drag it to the curb, consider this: a fresh coat of paint can transform weathered patio furniture into a focal point that ties your outdoor living space together. Painting patio furniture isn’t just cheaper than replacement: it’s a straightforward DIY project that takes a weekend and delivers professional-looking results. Whether the furniture is metal, wood, or plastic, the right prep work and materials make all the difference between a paint job that flakes in three months and one that holds up through years of sun, rain, and backyard gatherings.
Key Takeaways
- Painting patio furniture costs a fraction of replacement and extends the life of structurally sound pieces by 5–10 years with professional-looking results.
- Proper preparation—including cleaning, sanding, and priming—accounts for 70% of a successful patio furniture paint project and prevents peeling or poor finish quality.
- Use exterior-grade primer and acrylic latex or enamel paint specifically formulated for outdoor conditions, avoiding interior wall paint which will crack and peel.
- Apply thin, even coats in the direction of grain or frame lines, using foam rollers for flat surfaces and brushes for detailed areas, with proper drying time between coats.
- Sand lightly between coats with 220-grit sandpaper and allow patio furniture paint to cure fully for 1–2 weeks before use for maximum durability against sun, rain, and wear.
Why Paint Your Patio Furniture Instead Of Replacing It
Replacing an entire outdoor furniture set runs into the hundreds, sometimes thousands, of dollars. A gallon of quality exterior paint and a few hours of labor costs a fraction of that. Beyond the budget angle, painting gives you control over color and finish. Want to match a new deck stain, coordinate with fresh planter boxes, or refresh tired cushions? Paint is the quickest answer.
Beyond cost, painting extends the life of solid wood or metal frames that might otherwise go to waste. When furniture is structurally sound but cosmetically tired, refreshing the finish keeps it in the rotation for another 5–10 years. Many DIYers find the process itself rewarding, the meditative nature of sanding, the satisfaction of seeing transformation in real time. Plus, there’s no shipping delay or assembly frustration. You control the timeline and the outcome.
Essential Tools And Materials You’ll Need
Tools:
• Pressure washer or garden hose with a stiff brush
• 120–150 grit sandpaper (medium) and 220 grit (fine) for finish sanding
• Orbital sander (optional but speeds the job, especially for larger pieces)
• Paint tray or roller pan
• 2–3 inch paintbrush (natural bristles for latex, synthetic for oil-based)
• Roller with foam sleeve (for flat surfaces like tabletops)
• Drop cloth or plastic sheeting
• Painter’s tape
• Safety gear: goggles, nitrile gloves, and a dust mask or respirator (especially when sanding or spraying)
• Ear protection if using a power sander
Materials:
• Exterior-grade primer (oil-based for bare metal, water-based for wood or existing paint)
• Exterior furniture paint (acrylic latex or enamel, avoid indoor wall paint)
• Mild detergent for cleaning
• Mineral spirits (if using oil-based products) or water (for latex cleanup)
• Sandpaper conditioning block or sanding sponge for curves
Don’t cheap out on primer or paint. Bargain-bin products fail faster and require more coats. Mid-range exterior paint from a home center or online retailer (brands like Behr Premium Plus Ultra, Sherwin-Williams Duration, or Benjamin Moore Aura) strikes a balance between performance and cost.
Step-By-Step Preparation: The Foundation Of A Great Finish
Preparation accounts for 70% of a painted furniture project’s success. Skipping it is the #1 reason paint peels or looks muddy.
Cleaning And Removing Old Paint
Start by removing loose debris and grime. A pressure washer at 1500–2000 PSI handles stubborn dirt and mildew on metal frames without damaging wood. For delicate pieces, hand-scrub with a soft brush, warm water, and mild dish soap. Let everything dry completely, at least 24 hours in low humidity, longer if damp.
If the existing paint is thick, peeling, or chalky, strip it with a paint scraper or sanding sponge. You don’t need to remove every trace: feather the edges so new paint adheres smoothly. For metal furniture with rust, use a wire brush or a rotary wire wheel on a drill to remove surface corrosion and loose scale. Sand areas where rust is visible: the new primer will protect bare metal.
Sanding And Priming For Better Adhesion
Sand the entire surface with 120–150 grit sandpaper to dull gloss and open the surface for primer. Use an orbital sander on large flat areas, hand-sand curves and corners. You’re not aiming to sand down to bare substrate, just breaking the sheen and leveling rough patches.
After sanding, wipe the piece thoroughly with a tack cloth or damp rag to remove dust. Don’t skip this step: dust under paint creates a gritty, inferior finish. Once dry, apply primer. For bare metal, choose an oil-based metal primer: for wood or existing paint, a water-based bonding primer works fine. Two thin coats beat one thick coat. Let primer cure per manufacturer’s instructions, usually 1–4 hours for water-based, longer for oil-based. The primer’s job is adhesion, not coverage: don’t worry if underlying color shows through.
Choosing The Right Paint For Outdoor Furniture
Not all paint is created equal. Interior wall paint will peel and crack outdoors. You need acrylic latex exterior paint or exterior enamel, products formulated to flex with temperature changes and resist UV fading and moisture.
Latex exterior paint is the standard choice for DIYers: easier cleanup, low fumes, quick drying, and excellent durability when applied over primer. Oil-based exterior enamel provides a harder, glossier finish and slightly better hide on bare metal, but it dries slower and requires mineral spirits for cleanup. For furniture, satin or semi-gloss sheen resists fingerprints and dirt better than flat finish.
Color matters functionally, not just aesthetically. Darker colors absorb more heat and may feel hot to sit on: lighter colors reflect heat. Consider the material underneath, too. For metal frames that heat up in direct sun, a light to medium tone keeps the piece comfortable. Match paint and primer brands when possible, they’re formulated to work together.
Budget roughly $25–50 per gallon for quality exterior paint. One gallon covers about 250–400 square feet depending on substrate and sheen. A typical dining set uses 1–2 quarts: smaller chairs, 1 quart total. Buy slightly more than you think you need: second coats weeks later may not color-match perfectly.
Many homeowners refinishing furniture find that DIY furniture makeovers provide not only practical tips but also inspiration for choosing colors that complement their outdoor spaces. Reading through actual project photos helps visualize how your chosen paint will look on your specific pieces.
Application Techniques For A Professional Look
Painting technique separates amateur from polished results. Work on a calm day, wind blows dust and pollen onto wet paint, and high temperatures cause paint to dry too fast, leaving brush marks.
Lay down a drop cloth and set up in a shaded or sheltered area if possible. Direct sun speeds drying, making smooth application harder. Set out all tools and materials before opening the paint can: don’t let primer or paint sit exposed.
First coat: Stir the paint slowly for 2–3 minutes to distribute pigment evenly. Pour a small amount into a tray. Using a 2–3 inch brush, apply thin, even strokes in the direction of the grain (if wood) or along the frame (if metal). Overlap strokes slightly. For flat surfaces like table or chair seats, a foam roller spreads paint faster and more evenly than a brush. Avoid overloading the brush, excess paint runs and sags. Multiple thin coats beat one thick coat.
Dry time varies: latex typically 2–4 hours: oil-based, 8–24 hours. Check the label, don’t assume. Between coats, wrap the brush in plastic wrap and refrigerate it (sounds odd, but it works and saves cleanup time). After the final coat, let paint cure fully before using furniture. Most exterior paints reach full hardness in 1–2 weeks.
Brush techniques matter. Use long, smooth strokes and feather the edges of each stroke into the previous one. At corners and edges, apply paint with the brush edge, not the flat face, to avoid heavy buildup. For spindles, railings, or ornate details, a thin foam brush or angled sash brush reaches tight spots without drips.
If you’re painting a large set and want speed and uniform coverage, consider spray application. Budget home renovation projects often use sprayers for furniture because they deliver a smooth finish with zero brush marks, though spraying requires a well-ventilated area and wear a respirator-rated P100 cartridge for paint fumes. Brush and roller application work fine for most DIYers and give you more control in tight spaces.
Inspect each coat as it dries. Look for drips, sags, or areas where primer shows through. Sand lightly with 220 grit between coats if paint feels rough: this improves adhesion and smoothness of the final coat. Room transformations through painting show that even simple prep and technique differences elevate the final result dramatically.